If your platform has eCommerce capabilities, you may want to add or update products.
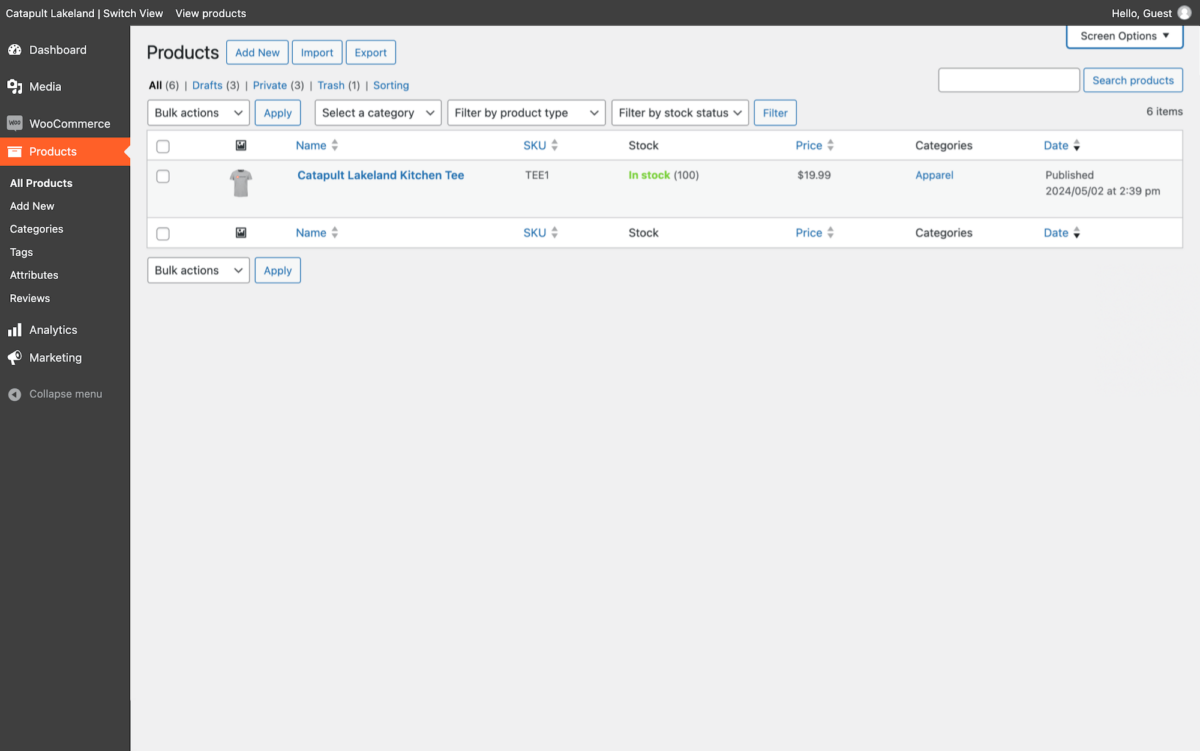
1. Use the dashboard menu to navigate to Products > All Products.
Here you can add a new product or edit a current product. You can also see information such as stock levels or sort by various columns:
2. Navigate to Products > Add New or hover over a current product and select Edit.
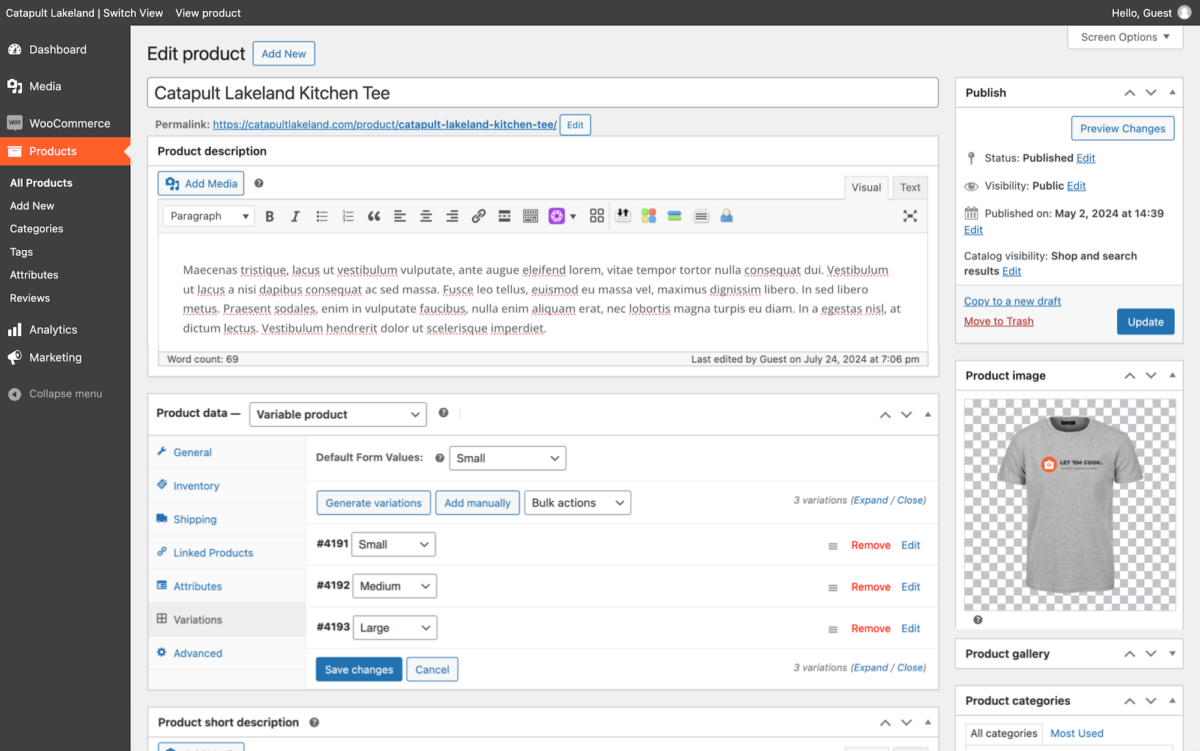
Whether you are adding or editing a product, the fields you will interact with are the same. This tutorial will help you add a new product, which will familiarize yourself with all of the settings.
3. In the title text field, write the title of your product.
4. In the product description text area, write the detailed description about your product.
This might include an introductory paragraph, bullet points regarding product features, testimonials, and more. This information will be displayed below the product images, price, and add to cart button. You will place a shorter product description in another text area that will display above the fold directly next to the product images.
5. In the product data box, select the type of product.
- Simple products do not have any variations for the user to select based on attributes like color and size. Examples include a coffee mug or a sticker.
- Variable products have variations based on any attribute. The most common attributes are color or size. Any time your product has multiple options of any kind, you can create an attribute and add the different variations for the user to select.
- Group products, external products, and bundles are other product options but are not as popular.
- Virtual and downloadable products will remove inventory and shipping options while adding links for the purchaser to download.
If you selected a simple or variable product, the following action steps are the same.
6. In the general tab: enter the standard product price, tax status, and tax status (almost always taxable and standard).
You can add a sale price and timeline to this product instead of adjusting the standard price. This will activate a “Sale!” banner on the product image.
7. In the inventory tab: enter the product SKU (must be unique), the stock status, and potentially the stock number.
Select “Allow backorders?” if you would like users to be able to place orders while the product is out of stock.
8. In the shipping tab: enter the weight of the product and the shipping dimensions for the product.
For hard items like a coffee mug, the product dimensions and the shipping dimensions are the same. For soft items like a tee shirt, the shipping dimensions of the rolled-up shirt will be much smaller.
Your eCommerce platform uses these shipping dimensions when calculating live shipping rates (if that feature is activated).
9. In the linked products tab: add any up-sells or cross-sells. Products you link here will be shown in various places when the current product is in the user’s cart.
10. In the attributes tab, add any product attributes that will be used for descriptive purposes or to activate different product variations.
For single products:
You can optionally add single attributes such as Color: Black. These are displayed below the product description and can be helpful for the shopper, but are not used for any additional purpose.
For variable products:
This tab is where you will enter the name and values of different attributes that will create product variations. For instance, Size: Small, Medium, Large. Or, Color: Black, White, Red. Make sure you select “Use for variations.”
If you have already created these attributes on other products, you should add them from the “Select existing” dropdown. This means they are “global” attributes, and can be connected to each other. If you ever change the attribute value label Black to Midnight Black, the global attribute label will change everywhere (including all of the products currently using it).
11. For variable products only, in the variations tab:
You most likely want to generate variations automatically. If you have three sizes and three colors, that means you have nine variations. Once your variations are generated, you will need to add information to each. The information in these variations will override the information in the general tab, because these are technically each a seperate product.
Expand each variation to add a unique SKU, the correct image, and a price for each variation. If managing stock, you will also set the stock amount for each variation.
12. In the product short description text area: enter a condensed version of the product description.
13. In the product image tab, add the properly formatted and compressed primary image for the product. This will be the image shown in the shop and when the product page is first loaded.
Learn how to properly label, format, and compress images here.
14. In the product gallery, add additional images that the user can scroll through. This might be different angles of a single product or the different featured images for variations (a user will also see the variation featured image when it is selected, but it is not in the product gallery by default).
15. In the product categories box, add the category(s) of the product.
16. In the product tags box, add any relevant tags (if you are using tags).
17. Based on your platform, there may be additional boxes with required information.
18. In the publish box, save your draft or confirm your visibility settings and publish the post.
Here is an example of a completed variable product:
To add / edit categories or global attributes, use the Products > Categories or Product > Attributes menu.